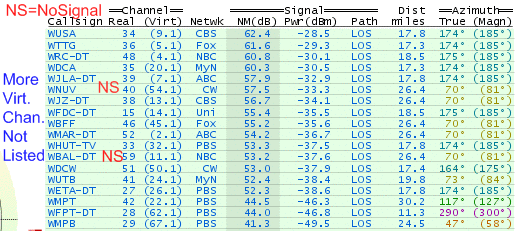
I was looking for a cheap solution that would get high definition digital broadcasts in time for the 2009 superbowl. My $10 radio shack rabbit ear antenna was only pulling in one digital channel and a few snowy analog channels. And the digital channel was not the one broadcasting the superbowl this year.
I was able to do much better with some scrap material and $20 in new parts. The result is what I call an elephant ear antenna. (Perhaps this style of antenna has a common name but I don't know what it is.) With this antenna my Panasonic DMR-EZ27 tuner pulls in every digital broadcast I knew about and found more that I did not realize existed.
This page was created to give other experimenters ideas and information on one approach that worked well.
| Antenna Type | Performance |
|---|---|
| Store-bought Rabbit Ear Antenna | 1 Digital Channel, several snowy analog (not rigorously tested from attic) |
| Scrap Built Elephant Ear Antenna |
I'm getting all but 2 of the digital channels identified by the www.tvfool.com website, and 17 additional virtual channels not listed in their report. Both the missing channels are broadcasting from the same location as 3 that are tuning in fine. Don't know how to explain that one. The placement of the antenna is such that those transmitter signals must pass through some large trees, roof material, and two drywall walls. (The antenna is on the unfinished attic wall side of a finished attic room.)
None of the channels listed on the report with co-channel and adjacent channel warnings tuned in.

NOTE: The additional virtual channels that also tuned but were not listed in the report are 2.2, 2.3, 4.2, 4.3, 7.2, 7.3, 9.29,22.2, 22.3, 26,2,26.3, 26.4, 45.2, 62.2, 62.3, 67.2, and 67.3.
Here are the parts I purchased for the project...
| 300 Ohm transformer (Radio Shack $10) | 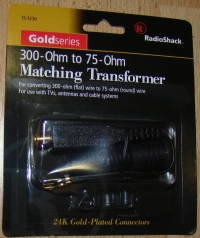
| |
| Roll of 3' x 5' Wire Mesh - 1/2" squares (Home Depot $10) | 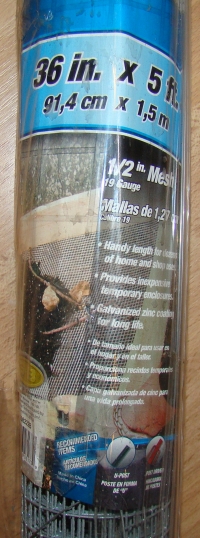
|
The construction was not very precise. Here are the tools I used...
Here are the steps I took...
| 1 | Cut the wire mesh into two equal size rectangles. Each one is 2.5' x 3'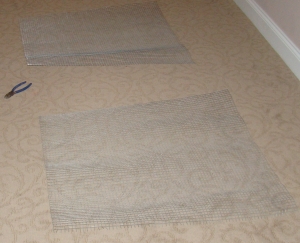 |
|
| 2 | Created 2.5 foot lengths of scrap wood - quantity 4 | |
| 3 | Created 3 foot lengths of scrap wood - quantity 2 | |
| 4 | Created 5 small blocks of wood to use as spacers. | |
| 5 | Stapled the 2.5 foot lengths to the ends of the mesh so it would not curl up. | |
| 6 | Bolted the 3 foot lengths across the middle of each mesh sheet to hold the ends apart. | |
| 7 | Bolted the two mesh sheets together at the center with a spacer block. | |
| 8 | Scraped zinc coating off metal in center of each mesh and soldered one lead of transformer to each mesh sheet. |
Construction took about one hour. I put some black electrical tape on the ends of the center bolt so it would not short the two mesh panels together. It is important that they not touch, otherwise the antenna will not work very well.
NOTE: A simpler construction would be to staple the two sheets on either side of a solid sandwich material -- perhaps many layers of cardboard or some other non-dense material.
Here is what my finished antenna looks like. Ugly is okay because it stays in the attic where my wife cannot see it!
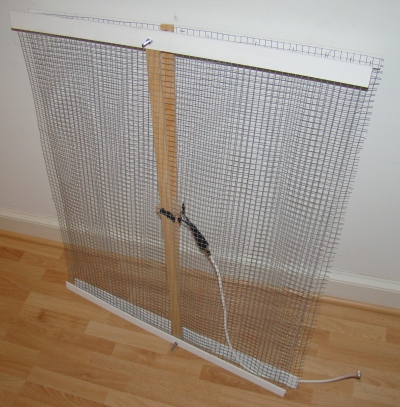
To make sure the ears did not touch each other, I placed scrap cardboard between them when I installed it in the attic. Here is a picture of the antenna installed and functioning in the attic.
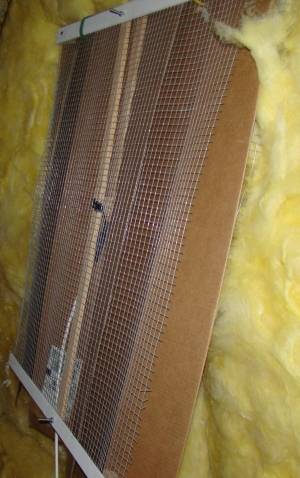
My antenna is installed vertically; held up by some nails directly aganst the back side of an insulated wall. I did not test it horizontally.
If you build one, let me know how it works out for you. You can reach me at frank@talkecho.com